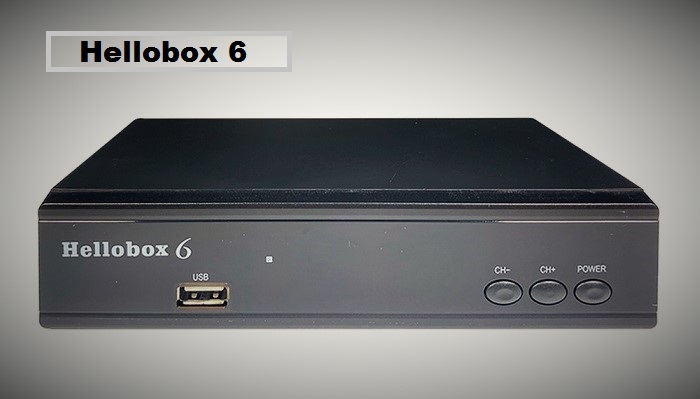
TIGER T9 PRIME RECEIVER

TIGER T9 PRIME RECEIVER SOFTWARE UPDATE

Introduction

In the ever-evolving world of satellite receivers, keeping your firmware up to date is crucial. TIGER T9 PRIME Receiver software update ensures enhanced functionality, improved stability, and access to the latest features. This guide provides a step-by-step approach to updating the software on your device while maintaining best practices for future updates.

Why Update the TIGER T9 PRIME Receiver Software?

Updating the software of your TIGER T9 PRIME Receiver brings numerous benefits, including:

  • Bug Fixes & Performance Improvements: Each update addresses known issues and enhances the performance of the receiver.
  • New Features & Enhancements: Manufacturers frequently release updates that introduce advanced features.
  • Security Updates: Protecting your device from vulnerabilities ensures uninterrupted service.
  • Compatibility with New Channels: Stay up to date with new satellite channels and broadcasting standards.

How to Download the Latest TIGER T9 PRIME Receiver Software Update

Follow these simple steps to download and install the latest TIGER T9 PRIME firmware update:

Step 1: Check Your Current Software Version

Before proceeding with the update, verify your receiver’s current software version.

  1. Navigate to Menu > Settings > System Info.
  2. Note the firmware version and compare it with the latest version available on the official TIGER website.

TIGER T9 PRIME Receiver Software All New Update Version

TIGER T9 PRIME
Update:10-02-2025
Version :Red Tiger T9 Prime V2.77
File Size : 8MBDownload

Step 2: Download the Latest Software Update

To ensure you get the correct firmware, always download updates from official or trusted sources.

  1. Visit the official TIGER Receiver website.
  2. Navigate to the Download or Support section.
  3. Look for the TIGER T9 PRIME latest software update.
  4. Download the firmware file (typically in .bin format).

Step 3: Prepare a USB Drive

  1. Format a USB flash drive to FAT32 format.
  2. Transfer the downloaded firmware file to the root directory of the USB.

Step 4: Install the Update on Your TIGER T9 PRIME Receiver

  1. Insert the USB drive into your receiver’s USB port.
  2. Navigate to Menu > USB Upgrade > Select File.
  3. Select the firmware file and press OK to start the update.
  4. Wait for the process to complete and do not turn off the receiver.

Step 5: Reboot & Verify

Once the update is complete:

  • The receiver will automatically reboot.
  • Go to Menu > System Info to confirm the new software version.

Troubleshooting Common Issues During Software Update

If you encounter issues during the update process, follow these troubleshooting tips:

  1. Receiver Not Detecting USB:
  • Ensure the USB is formatted to FAT32.
  • Try using a different USB port or flash drive.
  1. Software Update Fails or Freezes:
  • Double-check that you have downloaded the correct firmware version.
  • Restart the receiver and try again.
  1. Receiver Not Booting After Update:
  • Perform a factory reset by pressing and holding the reset button.
  • Reinstall the firmware using a different USB device.

Future-Proofing Your TIGER T9 PRIME Receiver

To ensure seamless updates in the future, follow these best practices:

  • Regularly Check for Updates: Visit the official TIGER Receiver website periodically.
  • Use Reliable Power Sources: Power fluctuations during updates can cause software corruption.
  • Back-Up Your Settings: Save important configurations before updating.
  • Avoid Third-Party Firmware: Unofficial software can lead to compatibility issues.

Comments

No comments yet. Why don’t you start the discussion?

Leave a Reply

Your email address will not be published. Required fields are marked *